WiFi e-paper display
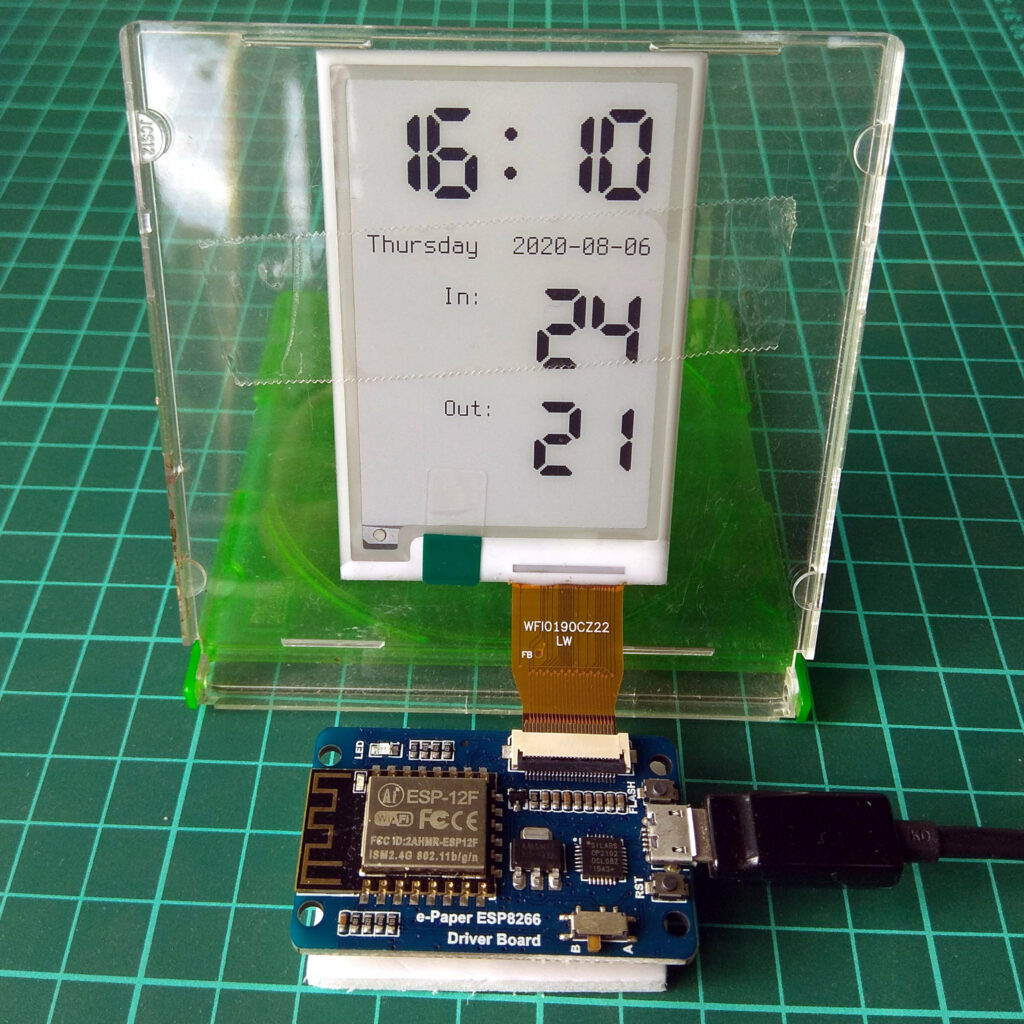
Recently I’ve put together a simple e-paper (a.k.a. e-ink) display which shows current time and temperature. Why e-paper? Unlike LCD it provides better contrast at any angle and unlike TFT it doesn’t require backlight. The only downside is long screen refresh time (~4 s in my case).
The idea was to get current time from an NTP server and temperatures from Home Assistant instance which in turn gets them from wireless sensors.
Hardware
I’ve ordered 2.7 inch e-paper screen and ESP8266 driver board from Waveshare. The board is well capable of connecting to WiFi, making UDP and HTTP requests and parsing JSON which is required for the task. And there’s still memory left for big custom fonts!
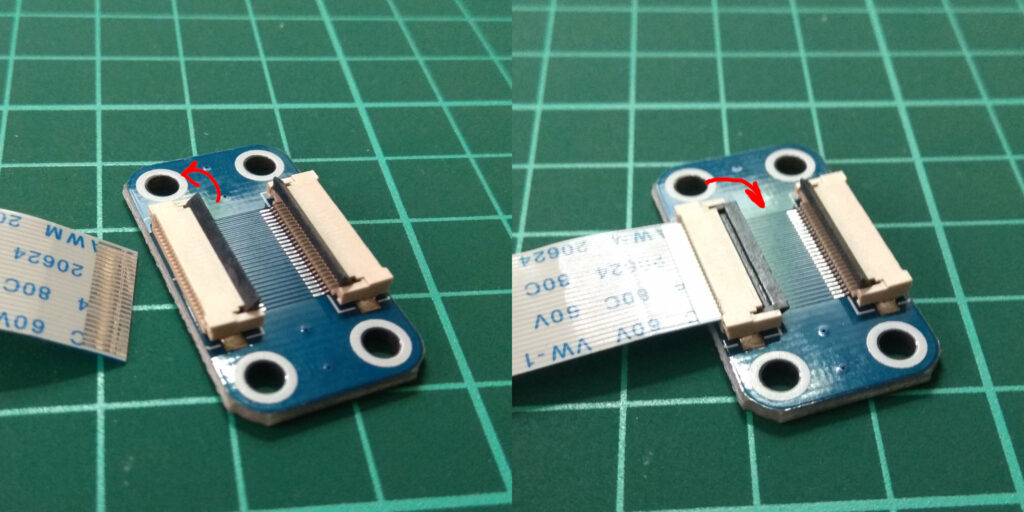
One thing to note is the connector for the display’s flat cable: open it by lifting the black bar on the back, insert the cable and close the connector by pushing the bar back down.

You may want to get another display model which supports partial updates so that the whole screen doesn’t go blank too often when values change. Keep in mind though that it still requires periodic full screen update (at least every 180 s according to the manufacturer) to get rid of accumulated artifacts. See chart on this page for all available options.
Software: libraries
Since it takes a few seconds to update e-paper screen I decided to update it every minute. Temperatures are updated at the same rate.
I’ve used the following 3rd party libraries:
- Waveshare ESP8266 driver board library;
- NTPClient fork to get time and date;
- ArduinoJson to parse Home Assistant data.
The first two should be downloaded and placed to ~/Arduino/libraries/ folder. Note that Arduino IDE may suggest to update NTPClient libray with the stock one which doesn’t support getFormattedDate() function used in this project!
Fighting the watchdog
Already during the test of the display with the demo program I noticed that the driver board was periodically rebooting. After a lot of debugging and searching for similar issues online I’ve discovered that adding a simple yield(); command to Waveshare’s library solved the problem. Apparently the wait for e-paper module to become ready is too long for ESP’s watchdog and yield command keeps it happy. Here’s my modified ~/Arduino/libraries/Waveshare/utility/EPD_2in7.cpp:
static void EPD_2in7_ReadBusy(void)
{
    Debug("e-Paper busy\r\n");
    UBYTE busy;
    do {
        EPD_2in7_SendCommand(0x71);
        busy = DEV_Digital_Read(EPD_BUSY_PIN);
        busy =!(busy & 0x01);
        yield();  // << Add this line.
    } while(busy);
    DEV_Delay_ms(200);
    Debug("e-Paper busy release\r\n");
}
Custom fonts

The Waveshare code comes with several built-in fonts but I needed a bigger one to make numbers more legible from the distance. I’ve found a nice tool called font2bytes which can convert a bitmap containing font characters to an array which can later be used with Waveshare library. You can draw your characters yourself (ah, I remember doing that for ZX Spectrum on squared paper… real paper, you know) or use existing TTF font and a convenient FontBuilder GUI program.
To create a font bitmap, start FontBuilder, select desired font and its size, tick Show missing glyphs checkbox and disable smoothing. Then choose Grid layout (single line) and untick One pixel separator. Select PNG output and click Write font to generate the file.
You’ll have to change colors of the resulting image for font2bytes converter:
$ mogrify -fill "#000000" -opaque "#ffffff" terminus_12.PNG
Finally, convert the image to C array:
$ f2b -h 16 -w 8 -f arduino terminus_12.PNG -o terminus_12.cpp
Where 16 is height of the image in pixels and 8 is image width divided by 95 (number of ASCII characters in it).
In my sketch I use big 7-segment LCD AT&T Phone Time/Date font (FontDD48) for time and temperatures and well known Terminus (FontT12) for text. To include them in your project, put the files alongside stock fonts to ~/Arduino/libraries/Waveshare/ and modify fonts.h there:
...
#define MAX_HEIGHT_FONT         51
#define MAX_WIDTH_FONT          32
...
extern sFONT FontDD48;
extern sFONT FontT12;
Of course you can replace them with stock Font12 and Font24 for the time being if you don’t want to bother with fonts for now, but soon enough you’ll want to. Pixel fonts are addictive! 😉
The sketch
If you want to get data from your Home Assistant instance you should create a Long Lived Access Token and put it in the sketch.
To display your local time you’ll need to know your time zone offset in seconds which you can find here. And if your location uses daylight saving time… sorry buddy you’re on your own there! 🙂
#include <stdlib.h>
#include <DEV_Config.h>
#include <EPD.h>
#include <GUI_Paint.h>
#include <NTPClient.h>
#include <ESP8266WiFi.h>
#include <WiFiUdp.h>
#include <ArduinoJson.h>
#include <ESP8266HTTPClient.h>

#define EPAPER  // Comment to disable e-paper output.

//#define DEBUG  // Comment to disable debug serial output.
#ifdef DEBUG
  #define DPRINT(...)    Serial.print(__VA_ARGS__)
  #define DPRINTLN(...)  Serial.println(__VA_ARGS__)
#else
  #define DPRINT(...)
  #define DPRINTLN(...)
#endif

#ifdef EPAPER
UBYTE *BlackImage;
#endif

const char *ssid = "ssid";
const char *password = "password";

const char *ntp_server = "192.168.0.1";  // Use pool.ntp.org if your router doesn't provide NTP.
const char *ha_t1_url = "http://192.168.0.100:8123/api/states/sensor.temperature1";
const char *ha_t2_url = "http://192.168.0.100:8123/api/states/sensor.temperature2";
const char *ha_auth = "Bearer long_lived_access_token_string";

const long utcOffsetInSeconds = 10800;  // MSK.

char daysOfTheWeek[7][12] = {"Sunday", "Monday", "Tuesday", "Wednesday", "Thursday", "Friday", "Saturday"};

// Define NTP Client to get time.
WiFiUDP ntpUDP;
NTPClient timeClient(ntpUDP, ntp_server, utcOffsetInSeconds);
// HTTP client to get HA response.
HTTPClient http;

unsigned long startMillis;
unsigned long currentMillis;
unsigned long periodNTP = 1000;  // Inintial update period.


void setup()
{
  WiFi.mode(WIFI_STA);
  WiFi.hostname("waveshare01");
  WiFi.begin(ssid, password);

  while (WiFi.status() != WL_CONNECTED) {
    delay(500);
    DPRINT(".");
  }

  timeClient.begin();

  #ifdef EPAPER
  UWORD Imagesize = ((EPD_2IN7_WIDTH % 8 == 0) ? (EPD_2IN7_WIDTH / 8 ) : (EPD_2IN7_WIDTH / 8 + 1)) * EPD_2IN7_HEIGHT;
  if ((BlackImage = (UBYTE *)malloc(Imagesize)) == NULL) {
    DPRINTLN("Failed to apply for black memory...");
    while (1);
  }

  DEV_Module_Init();
  EPD_2IN7_Init();
  EPD_2IN7_Clear();
  DEV_Delay_ms(500);
  Paint_NewImage(BlackImage, EPD_2IN7_WIDTH, EPD_2IN7_HEIGHT, 0, WHITE);
  Paint_SelectImage(BlackImage);
  Paint_Clear(WHITE);
  #endif
  startMillis = millis();
}

char tempInC[10] = "";
char tempOutC[10] = "";
char timeC[255] = "";
char dowC[255] = "";
String dateS = "";


void loop()
{
  currentMillis = millis();

  if (currentMillis - startMillis >= periodNTP) {

    // Get NTP date and time.
    if (timeClient.update()) {
      int cHr = 0;
      int cMn = 0;
      cHr = timeClient.getHours();
      cMn = timeClient.getMinutes();
      sprintf(timeC, "%2d:%02d", cHr, cMn);
      sprintf(dowC, "%s", daysOfTheWeek[timeClient.getDay()]);
      dateS = timeClient.getFormattedDate();
      DPRINT("Got NTP time: ");
      DPRINTLN(dateS);
      dateS = dateS.substring(0, dateS.indexOf("T"));
      periodNTP = 60000 - (timeClient.getSeconds()*1000);  // Next update at 00 s.
      DPRINT("Setting period to ");
      DPRINTLN(periodNTP);
    } else {  // Error getting time.
      timeC[2] = 'X';
      periodNTP = 10000;  // Retry in 10 s.
    }

    // Get temperatures from Home Assistant.
    DynamicJsonDocument doc(512);  // Increase if server response is too big.
    http.begin(ha_t1_url);
    http.addHeader("Authorization", ha_auth);
    http.addHeader("Content-Type", "application/json");
    int httpCode = http.GET();
    if (httpCode == HTTP_CODE_OK) {
      deserializeJson(doc, http.getStream());
      int tempIn = round(doc["state"].as<float>());
      sprintf(tempInC, "%3d", tempIn);
      DPRINT("Got JSON inside temperature: ");
      DPRINTLN(tempIn);
    }
    http.begin(ha_t2_url);
    http.addHeader("Authorization", ha_auth);
    http.addHeader("Content-Type", "application/json");
    httpCode = http.GET();
    if (httpCode == HTTP_CODE_OK) {
      deserializeJson(doc, http.getStream());
      int tempOut = round(doc["state"].as<float>());
      sprintf(tempOutC, "%3d", tempOut);
      DPRINT("Got JSON outside temperature: ");
      DPRINTLN(tempOut);
    }
    http.end();

    #ifdef EPAPER
    // Output values to e-Paper.
    DPRINTLN("e-Paper Init and Clear...");
    EPD_2IN7_Init();
    EPD_2IN7_Clear();
    DPRINTLN("e-Paper Paint Clear...");
    Paint_Clear(WHITE);
    DPRINTLN("e-Paper drawing text...");
    // Time.
    Paint_DrawString_EN(10, 10, timeC, &FontDD48, WHITE, BLACK);
    // Day of week.
    Paint_DrawString_EN(7, 80, dowC, &FontT12, WHITE, BLACK);
    // Date.
    int str_len = dateS.length() + 1;
    char char_array[str_len];
    dateS.toCharArray(char_array, str_len);
    Paint_DrawString_EN(90, 80, char_array, &FontT12, WHITE, BLACK);
    // Temperatures.
    Paint_DrawString_EN(50, 110, "In:", &FontT12, WHITE, BLACK);
    Paint_DrawString_EN(50, 180, "Out:", &FontT12, WHITE, BLACK);
    Paint_DrawString_EN(74, 110, tempInC, &FontDD48, WHITE, BLACK);
    Paint_DrawString_EN(74, 180, tempOutC, &FontDD48, WHITE, BLACK);
    DPRINTLN("e-Paper Display...");
    EPD_2IN7_Display(BlackImage);
    DPRINTLN("e-Paper Sleep...");
    EPD_2IN7_Sleep();
    #endif

    startMillis = currentMillis;
  }
  ESP.wdtFeed();
}
Other options
Alternatively you can use libraries such as ESPHome which has built-in support for many e-paper modules, TTF fonts and smart home integration.
And if you’re not much into DIY you can get a nice looking battery powered e-ink Xiaomi bluetooth clock + thermometer which apparently can also send data to Home Assistant.
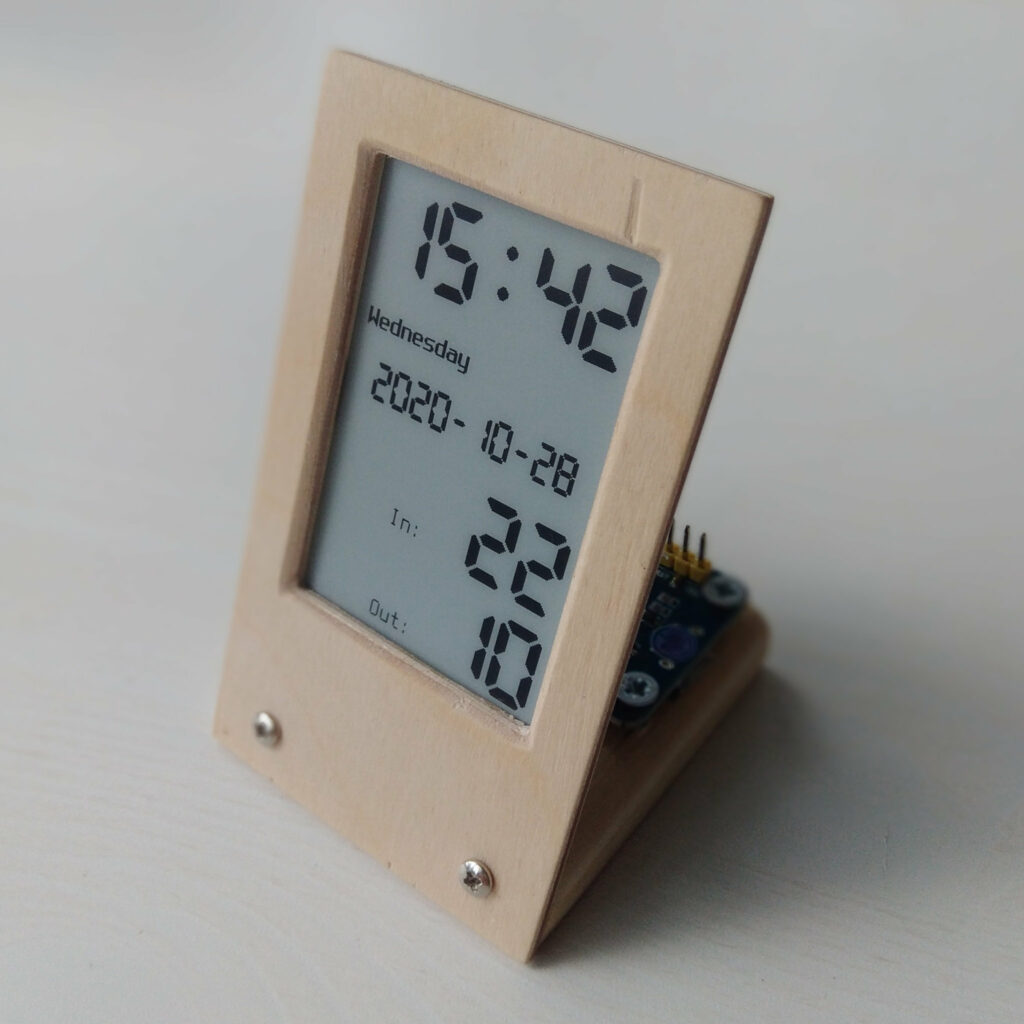
UPD: I’ve added a photo of finished device with display mounted on a thin plywood frame and a wooden base with driver board attached to it.


 BY-NC-SA
I tried this approach on an Arduino nano but the larger font used all the dynamic memory (1030% of Dynamic Memory)
Any tips?
Ian
I see no easy solution here, sorry. In my view one would need to implement some kind of data compression on the arrays.
Have you tried ESPHome by the way? There’s font rendering engine in it (https://esphome.io/components/display/index.html). It may be less memory hungry than this approach.